 Save
Save My kitchen timer had been lying to me for months before I figured out why my chicken always came out dry. Turns out, the real secret wasn't timing at all, it was the pounding. Once I started evening out those thick spots, everything changed. Now this recipe is my answer to Sunday meal prep, Tuesday panic dinners, and that smug feeling when guests ask how I got the chicken so tender. It's almost embarrassing how simple it is.
I made this for my sister after her second kid was born, and she called me crying because it was the first real meal she'd had in a week that didn't come from a cardboard box. She ate it cold, straight from the fridge at midnight, standing in her kitchen in the dark. That's when I knew this recipe wasn't just easy, it was necessary. Sometimes the best cooking is the kind that doesn't ask anything of you except to show up and turn on the oven.
Ingredients
- 4 boneless, skinless chicken breasts (6 to 8 oz each): The star of the show, and honestly the trickiest part is just making sure they're all the same thickness so they cook evenly without any dry edges.
- 2 tablespoons olive oil: This helps the spices stick and gives the chicken a golden finish instead of that sad, pale look nobody wants.
- 1 teaspoon garlic powder: I used fresh garlic once and it burned, so now I stick with the powder and sleep better at night.
- 1 teaspoon onion powder: Adds a sweet, savory depth without making you cry over a cutting board.
- 1 teaspoon paprika (smoked or sweet): Smoked paprika makes it taste like you grilled it even though you didn't leave the house.
- 1 teaspoon dried oregano or Italian seasoning: I keep a jar of Italian seasoning specifically for this because it does all the thinking for me.
- ½ teaspoon salt: Don't skip this or you'll wonder why everything tastes flat.
- ¼ teaspoon black pepper: Just enough to remind you there's seasoning without making it spicy.
- Lemon slices (optional): They look pretty and add a bright pop if you remember to grab one before serving.
- Chopped fresh parsley or cilantro (optional): I use parsley because cilantro tastes like soap to half my family.
- ¼ cup olive oil (for marinade, optional): If you have the time, this makes the chicken even more foolproof.
- 2 tablespoons lemon juice (for marinade, optional): Adds tang and helps tenderize the meat a little.
- 2 tablespoons soy sauce (for marinade, optional): Brings that umami magic that makes people ask what your secret is.
- 1 tablespoon honey or maple syrup (for marinade, optional): Balances the salt and gives a subtle caramelized edge.
- 1 teaspoon Dijon mustard (for marinade, optional): Adds a tiny bite and helps everything emulsify.
- 1 clove garlic, minced (for marinade, optional): Fresh garlic works here because it's swimming in liquid and won't scorch.
- ¼ teaspoon black pepper (for marinade, optional): A little extra never hurt anyone.
Tired of Takeout? 🥡
Get 10 meals you can make faster than delivery arrives. Seriously.
One email. No spam. Unsubscribe anytime.
Instructions
- Preheat and Prep Your Pan:
- Set your oven to 400°F and line a baking sheet with parchment paper or give a baking dish a light coating of oil. This step feels silly until you're scrubbing baked-on chicken juice at 9 p.m.
- Pound the Chicken:
- Pat the breasts dry, then sandwich them between plastic wrap or parchment and gently pound them to an even ¾ inch thickness with a mallet or rolling pin. This is the step that changed everything for me, no more raw middles or dried-out edges.
- Mix Your Seasoning:
- In a small bowl, stir together olive oil, garlic powder, onion powder, paprika, oregano, salt, and pepper until it looks like a fragrant, orange-tinted paste. It smells better than it looks, I promise.
- Season the Chicken:
- Rub the seasoning mix all over both sides of each chicken breast, making sure to get into every curve and edge. If you're using the marinade, let the chicken soak for 30 minutes to 2 hours in the fridge, then pat it dry before seasoning.
- Arrange on the Pan:
- Lay the chicken breasts in a single layer on your prepared pan, leaving a little space between each one so they roast instead of steam. Crowding them is how you end up with rubbery chicken.
- Bake Until Perfect:
- Slide the pan into the oven and bake for 18 to 22 minutes, or until an instant-read thermometer hits 165°F in the thickest part. I check at 18 minutes because my oven runs hot and I've learned my lesson.
- Rest Before Slicing:
- Pull the chicken out and let it sit for 5 minutes on the pan. This lets the juices settle back into the meat instead of running all over your cutting board.
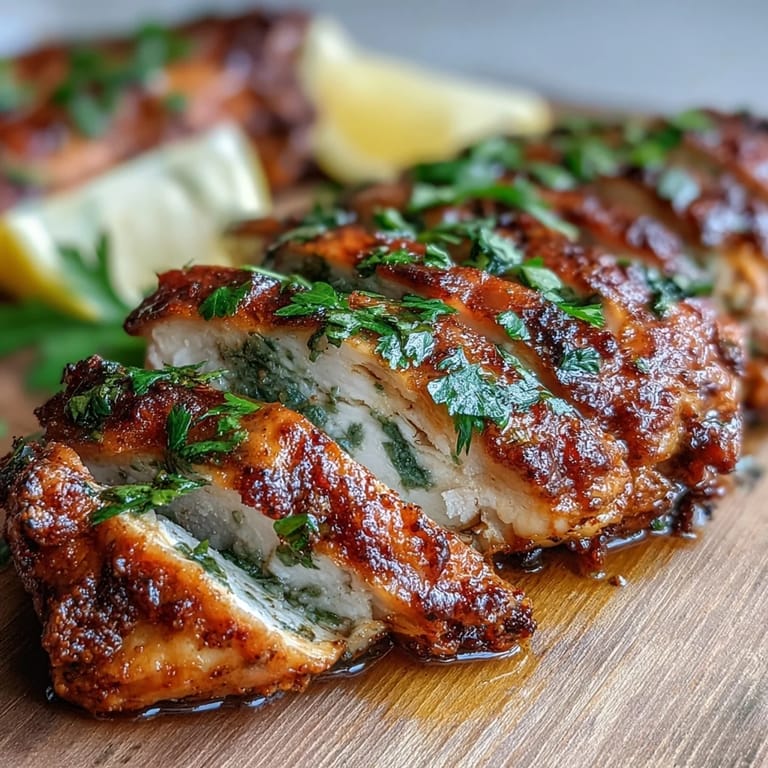
- Garnish and Serve:
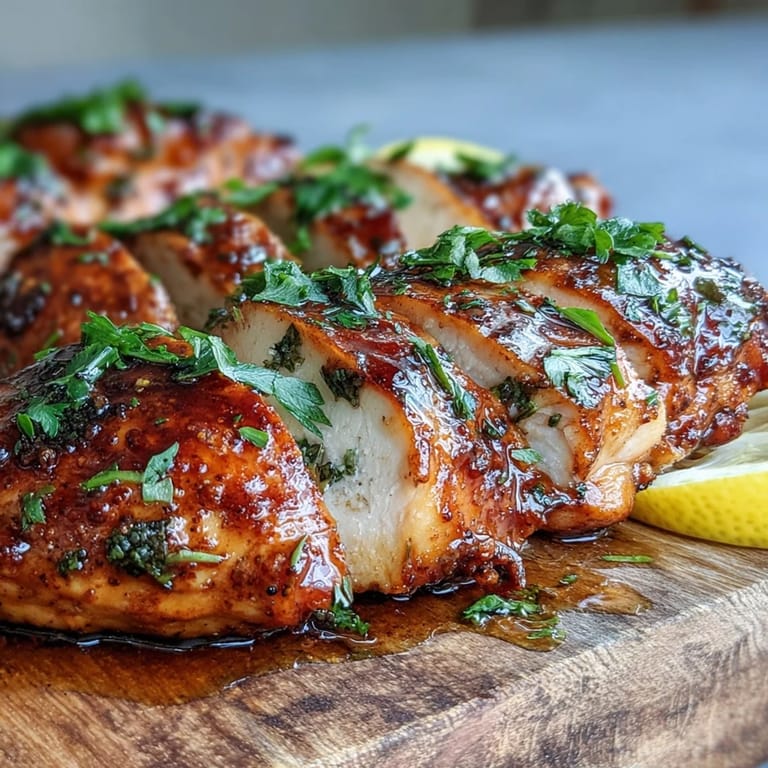
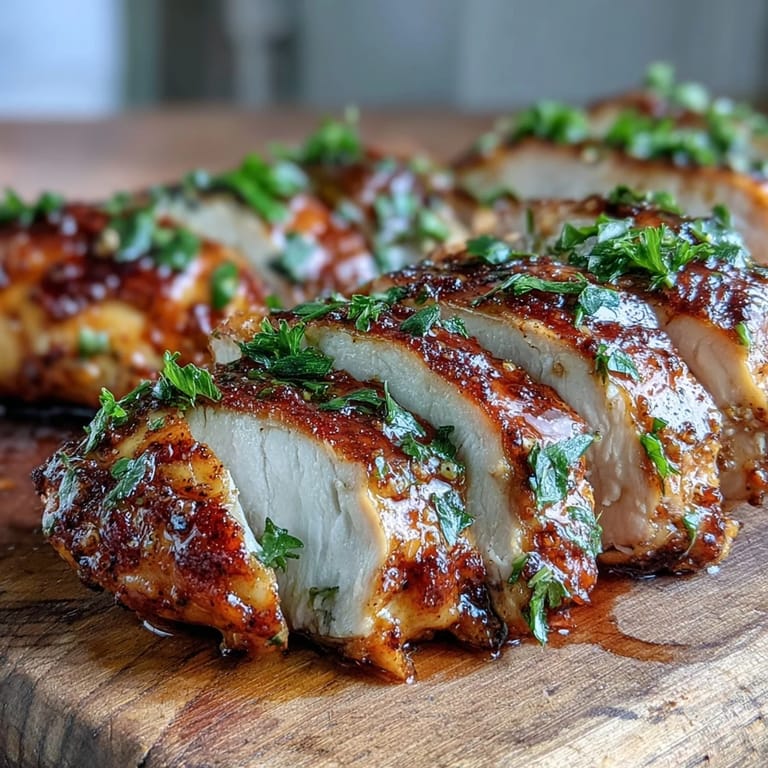
- Top with lemon slices and a sprinkle of parsley or cilantro if you're feeling fancy. Serve it warm, or let it cool and tuck it into containers for the week ahead.
 Save
Save The first time I made this for a potluck, someone accused me of lying about baking it because it was too moist. I took it as the highest compliment. Now it's my go-to whenever I need to look like I have my life together, even when I absolutely don't. There's something deeply satisfying about pulling off a dish this good with this little effort.
How to Store and Reheat
Let the chicken cool completely, then pack it into airtight containers and stash it in the fridge for up to 4 days. I slice mine before storing so I can grab it cold for salads or warm it up fast in the microwave for 60 seconds. If you reheat it in the oven, cover it with foil and keep the temp low around 325°F so it doesn't dry out. I've also frozen cooked chicken like this for up to 3 months, and it defrosts beautifully overnight in the fridge.
Ways to Switch It Up
This recipe is basically a blank canvas. Swap the paprika for cumin and chili powder if you want a Tex-Mex vibe, or use curry powder and turmeric for something warmer and more golden. I've tossed in a handful of cherry tomatoes and olives halfway through baking and it turned into a whole different meal. You can also use chicken thighs instead of breasts, just add 5 to 7 minutes to the baking time and check the temp.
Serving Suggestions
I love slicing this over mixed greens with a lemony vinaigrette, or tucking it into a wrap with hummus and cucumbers. It also pairs beautifully with roasted Brussels sprouts, garlic mashed potatoes, or a big bowl of buttery rice. My favorite lazy move is to shred the leftovers and toss them into pasta with olive oil, spinach, and Parmesan.
- Serve it with roasted vegetables and quinoa for a clean, balanced dinner.
- Slice it thin and layer it into sandwiches with avocado, arugula, and a smear of Dijon.
- Shred it and use it in tacos, grain bowls, or on top of pizza for easy protein.
 Save
Save This is the kind of recipe that makes you feel capable, even on days when you're not sure you are. Keep it in your back pocket and pull it out whenever you need a win.
Recipe FAQs
- → How do I keep chicken breasts from drying out?
Pounding the chicken to even thickness ensures uniform cooking. Letting the meat rest for 5 minutes after baking helps redistribute juices. Using an instant-read thermometer to pull at 165°F prevents overcooking.
- → What temperature should I bake chicken breasts?
Bake at 400°F (200°C) for 18–22 minutes. The high heat creates a nice exterior while keeping the interior juicy. Always check with a thermometer for accurate results.
- → Can I use chicken thighs instead?
Absolutely. Chicken thighs are naturally juicier and more forgiving. Increase baking time by 5–7 minutes and ensure the internal temperature reaches 165°F at the thickest part.
- → How long does cooked chicken keep in the refrigerator?
Store cooled chicken in airtight containers for up to 4 days. It reheats beautifully in the microwave or can be enjoyed cold in salads and sandwiches.
- → What sides go well with baked chicken breast?
Roasted vegetables like broccoli, carrots, or potatoes complement the mild flavor. It also pairs perfectly with rice, quinoa, or a fresh green salad for a complete meal.
- → Should I marinate the chicken first?
Marinating is optional but adds extra flavor. The simple marinade with olive oil, lemon juice, soy sauce, and honey works beautifully for 30 minutes up to 2 hours before baking.